Getting Started
Getting your Board
At the current point in time, there is no official way to buy an epdiy board. Fortunately, it is quite easy to order your own. There are many PCB prototype services that will manufacture boards for a low price.
To use one of those services, upload the “Gerber files”, usually provided as a zip file, to the service. You can find all the available hardware listed on the Hardware Page.
Choosing and Finding Parts
The parts needed to assemble the epdiy board are listed in the BOM.csv file. Commodity parts like resistors, capacitors, coils and diodes are interchangable, as long as they fit the footprint. When in doubt, use the parts listed in the BOM file.
However, some parts are not as common, especially the connectors. Most of them can be found on sites like eBay or AliExpress.
- Tips:
Use the WROVER-B module instead of other WROVER variants. This module exhibits a low deep sleep current and is proven to work.
The LT1945 voltage booster seems to be out of stock with some distributors, but they are available cheaply from AliExpress.
Calibrate VCOM
Note
Only for old boards
This is only needed with boards prior to revision 6.
From revision 6 onwards, VCOM can be set in software via epd_set_vcom(..).
EPaper displays use electrical fields to drive colored particles. One of the required voltages, VCOM (Common Voltage) is display-dependent and must be calibrated for each display individually.
Fortunately, the VCOM voltage is usually printed on the display, similar to this:
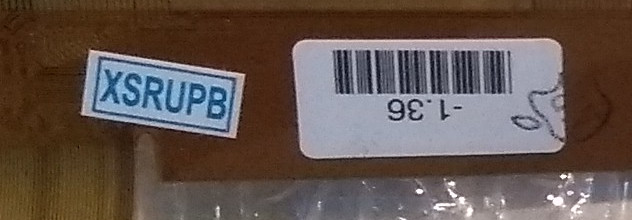
The VCOM value is usually between -1V and -3V.
For the v6 board, you can enter the desired VCOM value in make menuconfig.
No interaction is required.
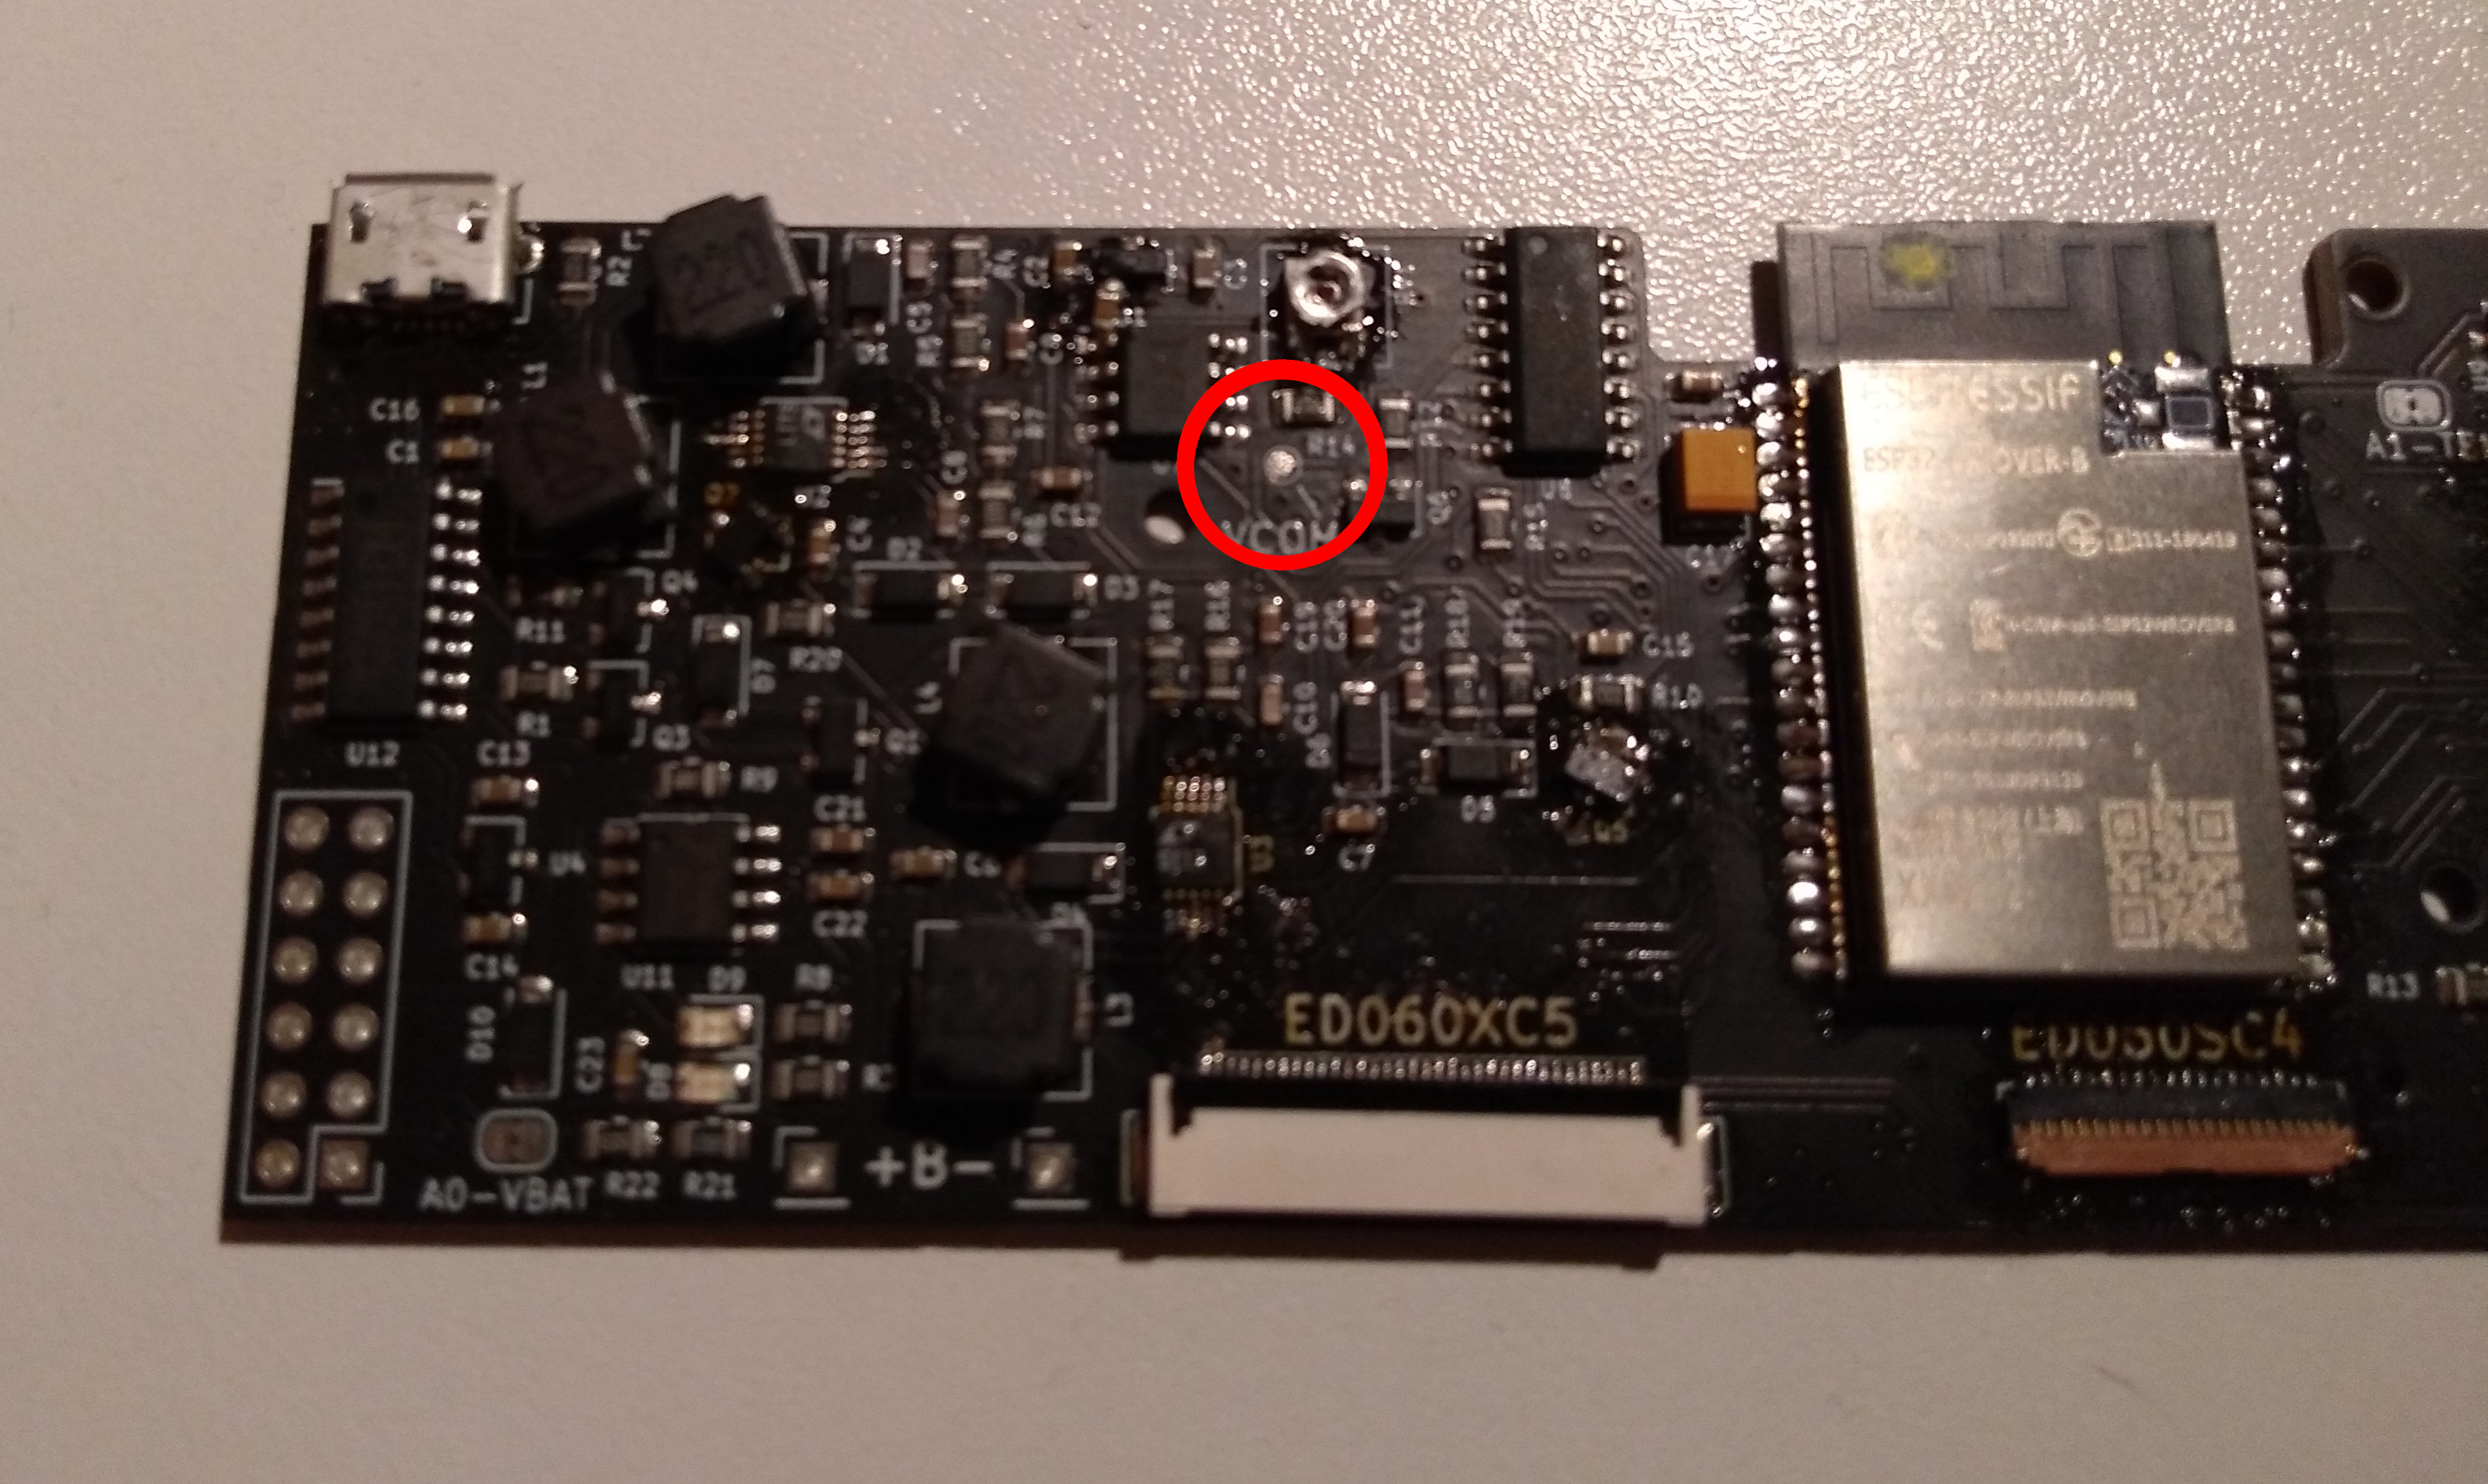
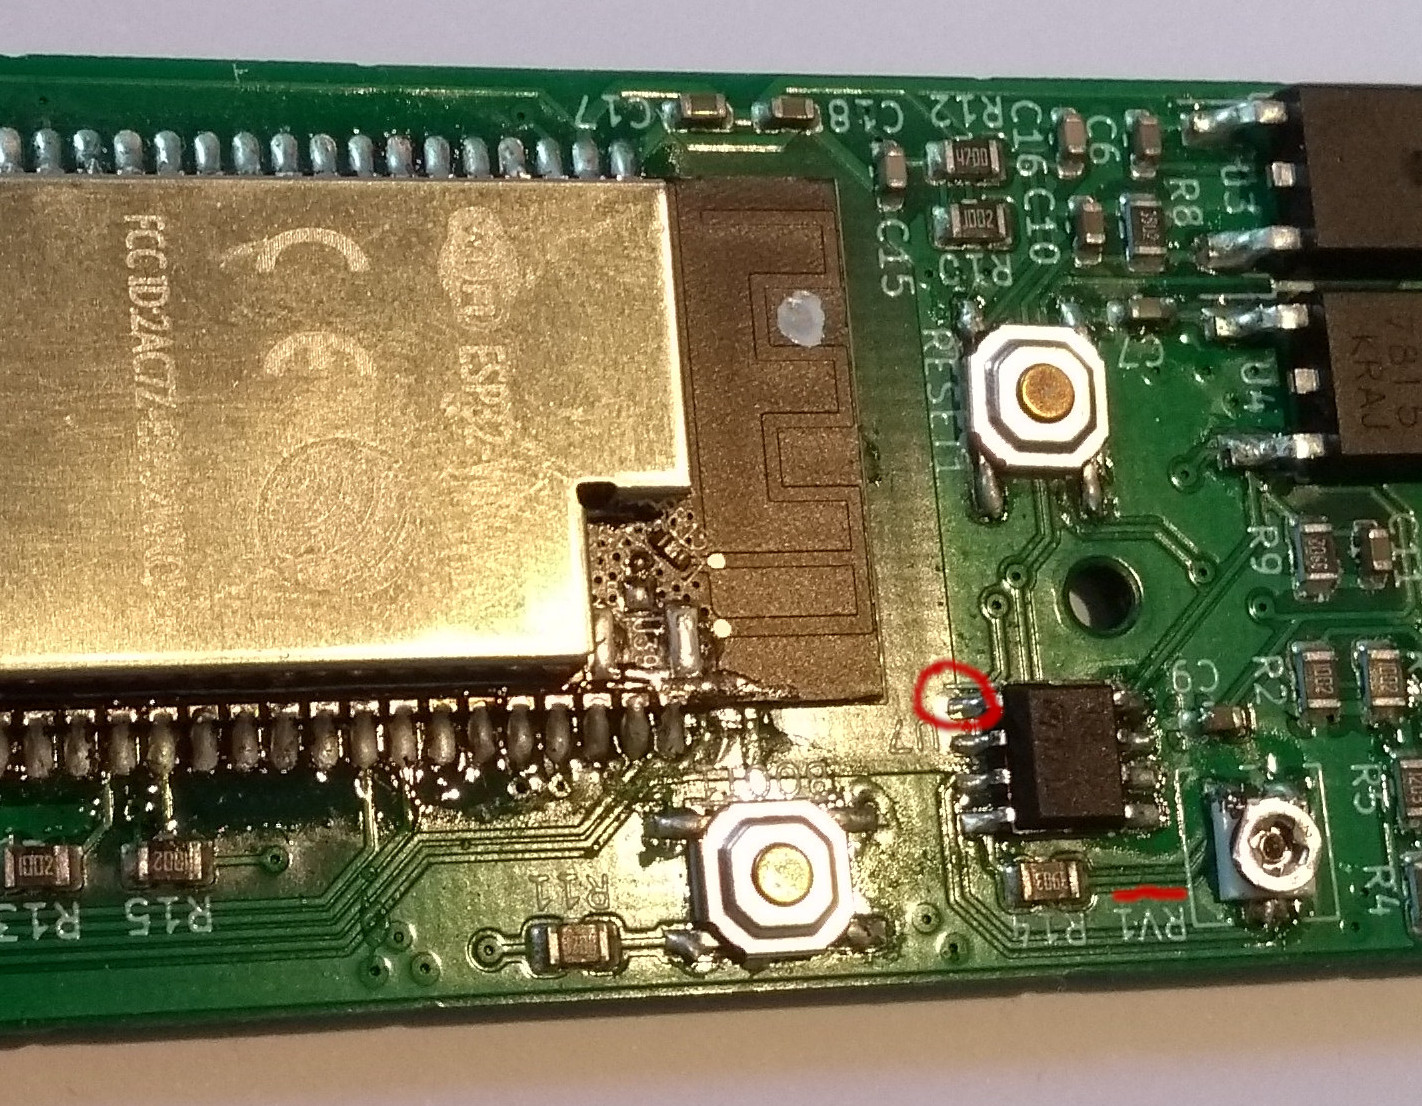
For the older models, use the trimmer marked RV1.
You can measure the VCOM on the VCOM test pad (if your board has one) or directly
at the amplifier:
Note
Although most boards do not have it yet, image quality for partial updates can be improved by adding a (at least) 4.7uF capacitor between VCOM and GND. When adding this capacitor, take care with the polarity as VCOM is negative!
Flashing the demo
First, connect you board with the computer. In the output of lsusb you should find something like:
Bus 001 Device 048: ID 1a86:7523 QinHeng Electronics HL-340 USB-Serial adapter
This means the serial adapter is working and there a serial like /dev/ttyUSB0 should appear.
Next, make sure you have the Espressif IoT Development Framework installed. The current stable (and tested) version is 4.0. For instructions on how to get started with the IDF, please refer to their documentation.
Then, clone the epdiy git repository (and its submodules):
git clone --recursive https://github.com/vroland/epdiy
Now, (after activating the IDF environment) you should be able to build the demo:
cd examples/demo/
idf.py build
Hold down the BOOT button on your board, while quickly pressing the RESET button.
The ESP module is now in boot mode.
Upload the demo program to the board with
idf.py flash -b 921600 && idf.py monitor
Pressing RESET a second time should start the demo program, which will
output some information on the serial monitor.
With the board power turned off, connect your display. Power on the board. You should now see the demo output on your display.
Use with esp-idf
The neccessary functionality for driving an EPD display is encapsulated in the components/epdiy IDF component.
To use it in you own project, simply copy the epdiy folder to your project-local components directory.
The component sould be automatically detected by the framework, you can now use
#include "epdiy.h"
to use the EPD driver’s Library API.
Selecting a Board and Display Type
With epdiy 2.0.0, the display type and board are set via epd_init().
Enable SPI RAM
The ESP32-WROVER-B comes with an additional 8MB external PSRAM, where the epdiy is going to store ~2MB for its internal frame buffers.
Since it is dynamically allocated from the heap, and the built-in SRAM of ~160KB is insufficient, we need to enable external SPI RAM first.
Open the menuconfig again (see above) and navigate to Component config -> ESP32-Specific -> Support for external, SPI-connected RAM and enable it.
Use with Arduino
Epdiy can be used as an Arduino library. Additionally, epdiy comes with board definitions for its supported boards, which must be installed separately. To install epdiy to work with the Arduino IDE (>= 1.8), place the downloaded repository into your Arduino libraries folder.
Alternatively, it is possible to use the Arduino APIs as an IDF component, which allows you to use the Arduino ecosystem (Except for a different build process). This gives you full access to ESP-IDF options.